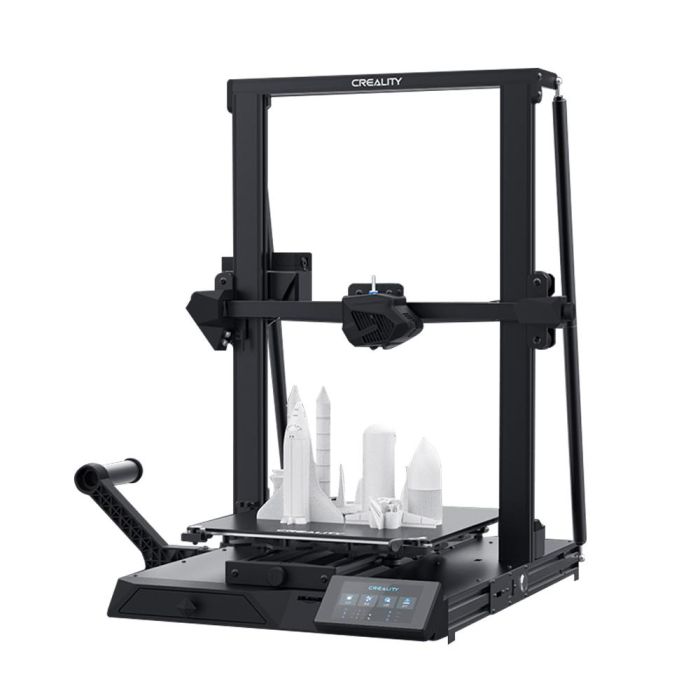
Creality CR-10 Smart - 30x30x40cm
CREALITYEAN : 6971636409335
Mfg Part No : >CR-10 Smart
Creality CR-10 Smart: Printer got smarter. Intelligent Experience Advanced Performance Super Car Design
HighlightsIn Stock
Description
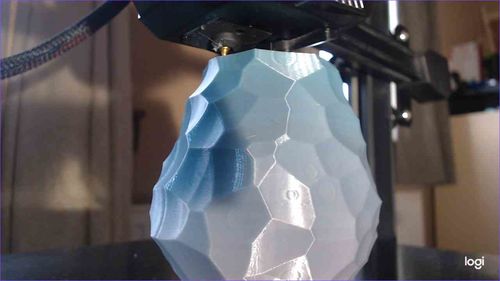
CR-10 Smart Creality 3D printer
Creality new FDM 3d printer-CR-10 Smart is coming, which will give you an innovative experience of 3d printing.
Eight Delicate Features
- Built-in WIFI function: Remote control printing anytime, anywhere
- Low Power Mode: Safe and worry-free save energy and power
- Intelligent Auto-leveling: Instant printing after initial auto-leveling
- Dual Z Axes+Dual Diagonal Drawbars: Ensure stable and precise printing
- 4.3-inch Full-view Touch Screen: Intuitive and easy-to-use
- Super Car Design: A combination design of aesthetics and technology
- Ultra-silent Design: Mute mainboard/Mute fan Low-noise power supply
- Modular Structure: 6-steps to assemble 8 minutes to complete
A Bit More Intelligence:
CR-10 Smart 3d printer supports both WIFI & RJ45 wired network connection. With the Creality Cloud APP, you can easily slice 3D models, remote control your printers, and print an object whenever and wherever with your phone.
Ultra-silent Design:
Self-developed 32-bit patented mute mainboard, low-noise power supply, and highly efficient cooling fans ensure a silent 3D printing experience.
Intelligent Auto-leveling:
With the V2.0 auto-leveling system, you can enjoy a hassle-free leveling process and instant printing after the initial auto-leveling is completed.
Screen Protection & Auto-shutdown:
The screen will dim if there's no manual operation in 30 mins to save power. And it's environmentally friendly.CR-10 Smart supports auto feeding and retreating filament which makes the process easier. The machine will auto shutdown after the model is completed to save power and effort.


Technical Data
| Construction an Technical Details | |
| Usable Nozzle Type | MK8 |
| Usable Filament Diameter | 1.75 mm |
| Max Nozzle Temperature | 260 ºC |
| Open Filament System | Yes |
| Extruder Type | Bowden |
| Build Area | 300 mm x 300 mm x 400 mm |
| Build Plate Temp Max | 100 ºC |
| Build Plate Material | Carborundum glass plate |
| Build Plate Attachment | clamp |
| Build Plate Leveling System | pressure sensor |
| Build Chamber During Process | Open |
| Extruder Number Of | 1 |
| Installation Space / Requirements | |
| Total Mass Overall Dimensions | 578 mm x 522 mm x 648 mm |
| Total Weight | 14 kg |
| Max Power Consumption | 350 W |
| Voltage | AC: 110 V - 240 V |
| DC: 24 V | |
| Equipment | |
| Hepa Filter | No |
| Filament Runout Sensor | Yes |
| Touch Screen | Yes |
| Connection | |
| SD Card | Yes |
| USB Port | Yes |
| Ethernet Port | Yes |
| WLAN | Yes |
| Cloud Control | Yes |
| Accuracy | |
| Resolution | 0.1 mm |
| Shipping | |
| Shipping Box | 660 mm x 575 mm x 290 mm |
| Shipping Weight | 17.3 kg |
Reviews
Customer Reviews

After talking to the Technology Outlet sales team, they recommended the slightly cheaper and wireless enabled CR10 Smart. After making the purchase and while waiting for it to arrive, I did a bit more research on this model. A lot of mixed reviews and several not very positive, which made me wonder why I didn't check before ordering. However, most of the reviews were of pre launch models. The biggest issue they seemed to highlight was the Auto Bed Levelling not working as expected, and a loose print bed.
Reviews also slated Creality's built-in wireless functionality. Initially I was intrigued by the wireless but really quite content to transfer gcode files via the SD card, just as per my previous printer.
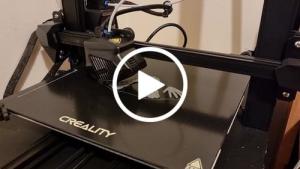
Having received the printer the following day, I was very pleasantly surprised by the build quality and tidiness of the wiring. A vast improvement on my old printer. All parts seemed to be secure, including the bed.
After assembly, I immediately updated the firmware for the main board and the display. Instructions on how to do this are on the Creality web site, and was easy enough to follow.
However, after updating the firmware, I thought something major had gone wrong when a lot of the text on the display was missing. It took a while to figure it out, and after several attempts to re-flash the firmware, it was simply needing the language to be set. Once that was done, the display was perfect. There was no mention of this in the the video guide for the Firmware update.
My reason for purchasing this printer was for the build area (300 x 300 x 400), quieter machine and simpler interface from the one press button rotary encoder control I had previously been used to. The way I see it, is that the fewer options to tinker with on the printer itself, the better. After all, most parameters of the printer can be affected via the slicer, right?
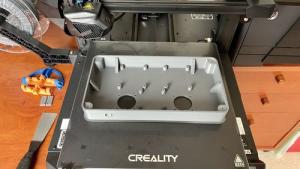
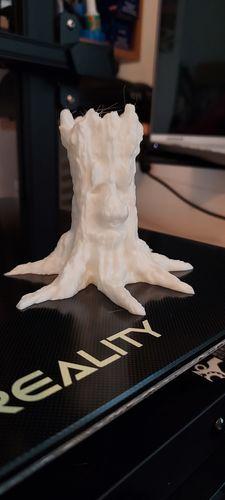
Anyway, I tried a couple of the print examples on the accompanying SD card, the Cat and the Dinosaur. The cat came to really nice, and I would say its the best quality print I've produced on any of my printers, all be it that it took several hours to print. The dinosaur was all wispy and looked quite awful, but the joins worked just fine. I did have issue getting the first layer down and that may well have been resolved by upping the heated bed and filament temperatures a few more degrees. The default Z offset of 0.2mm seems to be fine, although I did tinker with it, then later returned it to its default. I have to say that the Z offset setting on this printer is a breeze compared to all my previous printers. No bits of paper and no calculations needed.
I did check the X axis left to right hight from the bed, and it was about 0.5mm low on one side, so I slackened off the right hand Z axis and adjusted the lead-screw accordingly, then auto bed levelled again.
Some reviewers have noted that the printer is slow to start prints and does a bed levelling procedure for each print. Yes the Bed does take a long time to warm up, but my experience is that bed levelling only occurs when requested via the display, so not an issue. As soon as I power up the printer, I put it into the PLA pre-heat while I prep my files for printing, buy which time the bed is warmed up, so again, not an issue for me.
The printer manual does come with a sheet showing a set of gcode start and end instructions, so I have added those to the slicer. I currently use Simplify3D, that doesn't offer a profile for this printer, so I had to use the base CR10 profile and work from that.
I did try the Creality slicer (Cura), but I just don't get on with it. Even after loading the profile for the CR10 Smart, my attempts to print were terrible. Interestingly, sliced files for my old printer seem to work very well on this printer.
I have just taken a look at SuperSlicer, which looks an interesting alternative, but a steep learning curve no doubt, so for now, it's Simplify3D for me.
Important:
The manual states the glass bed can be cleaned with Isopropyl Alcohol. Luckily I'd seen some comments on forums stating that the alcohol removes the special coating. On the Creality web site, I did find a not saying not to use alchohol, so the manual is in error!
Therefore I just wash the glass sheet with washing up liquid and hot water, rinse and dry it. I find it holds the model very well. Sometimes to well and I have to place the sheet in the freezer for about 5 mins, where the model releases without any further issue.
The stepper motors are very quiet, but the hot end fan that cannot be shut off, is a slight irritating. I might look to try and find a quieter fan.
Although my previous printer had the same build volume as the CR10 Smart, I couldn't get it to reliably print large items, assuming that the bed was probably not levelled well enough. The CR10 Smart has been great by comparison.
I have seen from a couple of reviews that the internal wiring can be re-configured so that the printer can be directly controlled and monitored from a computer via USB. I carried out said alteration, but so far the computer doesn't see the printer. I may well need to try a different micro USB cable.
Although I don't want or need to tinker with the printer settings directly, It is sometimes useful to be able to interrogate the printer via a computer.
I notice there is an Ethernet port on the side of the printer, yet no mention of what its intended use is. I will assume it's an alternative to a USB connection to a computer, but I've yet to see a review mention it. Something else to try.
All in all, I am very pleased with the CR10 Smart printer, with not much to dislike about it. Diehard 3D printer experts may well knock it down, but compared to my previous printer, it's much easier for me to set up and use, and will do me just fine for the time being.
I just need to master the slicer settings.


Are you sure you would like to remove this item from the shopping cart?
This item is a part of the approved quote. Removing it will remove all quote items from the cart.